MailChimp is an online tool where you can do much more than just send emails. You can create simple web pages, basic questionnaires, and even remarketing Google and Facebook campaigns to your audience in the paid version.
The tool is very clear and simple. If you want to look at it, you can use the simplified version for free. It is one of the most used email tools globally, with very good deliverability.
Pros and cons
Pros:
- clear environment
- very high-quality templates
- connection to systems (overview of connection options)
- can be connected to multiple systems; if you need to connect to a specific system, I recommend googling it.
- servers have a good long-term deliverability record
- free version
- easy to work with editors that everyone can handle
- possibility to create pages and basic questionnaires
- the work here is very simple
Cons:
- price for e-commerce connection
- free version has no automation
- no addressing (can be easily set via Integromat)
- free version does not have A/B testing
- you can’t schedule a distribution in the free version
For whom it is suitable and for whom it is not suitable
This is a tool I would recommend for less technical types. Working with MailChimp is very simple and intuitive, but it’s a typical boxed solution that doesn’t leave much room for creativity and innovation. I recommend it to people who prefer simplicity and don’t like to use many different tools – ideal for a smaller company (freelancer) with a contact database of under a thousand emails.
Simplicity is the deciding factor for most people. However, if you have a large database of contacts, MailChimp may be more expensive and may not offer you some of the little extras necessary to work with a large database.
Friendliness and features
Registration
Registration is not complicated. After entering your login details containing your email, nickname, and password, just confirm the email. Then you choose the plan you want (we’ll talk more about plans later); the free one is the default. Next, fill in your contact details and address. You also enter information about whether you already have contacts and what you will use MailChimp for.
After registration, you will see the option to create your first campaign.
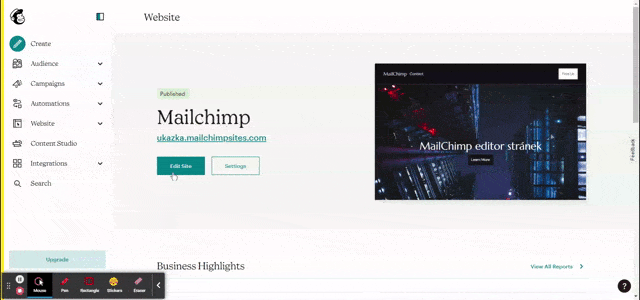
Sample environment, dashboard
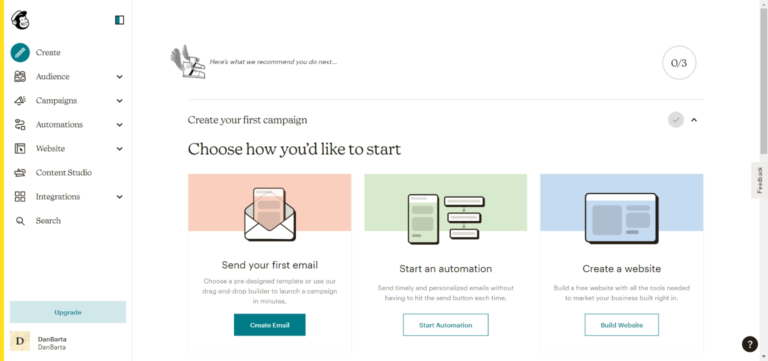
At first glance, the menu is very clear. Each card contains what I would expect to find in it. Just a few hours of browsing will give you an overview of what’s where. After registering, you will see a menu of what you would like to start with. In each category, you will also find instructions on how to create the items. The interface is easy to work with, takes no time to load, and everything is intuitive.
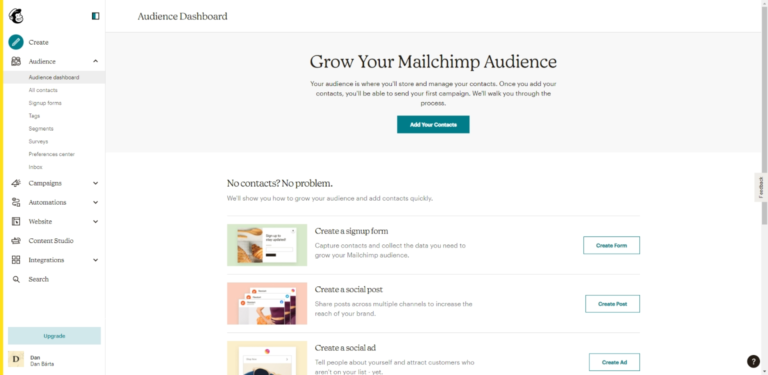
How to import contacts
If you already have a database of contacts, there are two ways to import them:
- Either by uploading a file,
- or you can just copy them.
For both methods, the
correct data
format must be followed; for example, the date of birth is in the form year-month-day. Therefore, it is better to check the format before uploading. Import contacts can be found in the Audiences tab under the
Add Your Contacts button.
The file can be in the format
TSV or
CSV. The easiest option is to upload your contacts to Google Spreadsheet and then download the CSV file. Name the data in the tables appropriately and then upload them to MailChimp. The file must not exceed 200 MB.
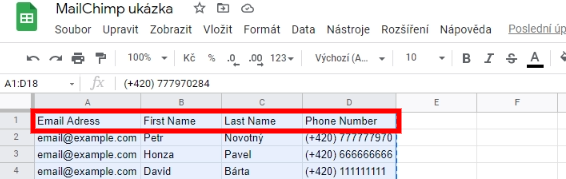
The procedure for copying files is similar. You copy your contacts into a spreadsheet (for example, Google Spreadsheet) and then just mark them and copy them into the prepared form. Uploading a file is definitely more practical with a larger number of contacts.
After uploading your contacts, Mailchimp will ask you about their status. Then, MailChimp will tell you what the selected status means and how the contacts can be handled. Alternatively, you can go through their
help.
Contact statuses:
These contacts have given you permission to send them marketing emails. So, you can send them all types of marketing emails.
These are contacts who received marketing emails but subsequently unsubscribed. You can send them: non-personalized ads, transactional emails (such as order notifications), and postcards. You cannot send them other marketing emails.
These contacts have interacted with you but have not permitted you to send marketing emails. You can send them the same emails as unsubscribed contacts.
These are contacts to which emails cannot be delivered. This may be a case of incorrectly filling in contact details. As a result, you can’t send them any emails.
These contacts have filled out the contact form but have not yet confirmed it. Therefore, they cannot be emailed until confirmation is received.
These are contacts that have been removed from marketing audiences. They will not receive any marketing communication until they are removed from them.
You can also choose to update your current contacts in this section. This is a handy tool if you have acquired new information about existing contacts.
After selecting the appropriate status, you can tag your contacts. For example, you can tag them according to how you got the leads (contest, Facebook, webinar). You can choose more than one of these tags and send emails according to them.

It will then display a table of your contacts and their labels (name, address, phone number, etc.) and allow you to check the accuracy of these labels or correct any errors.
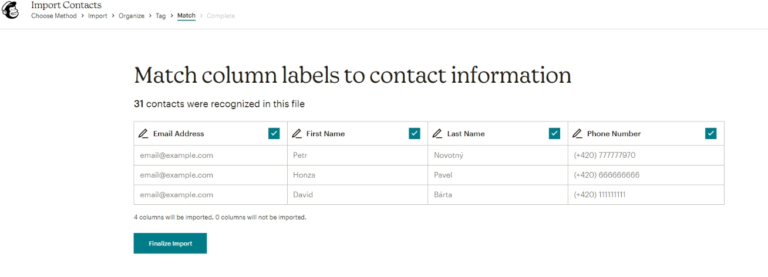
If you want to change the label, just click on the name of the label to see the options. Information you already have is displayed in a different color for clarity. As you can see, there is quite a lot of information that MailChimp can handle about people.

An error may occur during import. If an error occurs, you will receive an email notifying you which error occurred. If the contacts are imported correctly, you will also receive an email saying, “Your import is complete”.
Working with contact lists
Segmentation
Segmentation is used to logically divide contacts according to certain conditions. You can then personalize your communication for different segments. It is very important for an email tool to handle contact segmentation nowadays due to the growing trend of personalizing ads in the online world.
Segments can be found in the Audience -> Segments tab, where you can also create them.
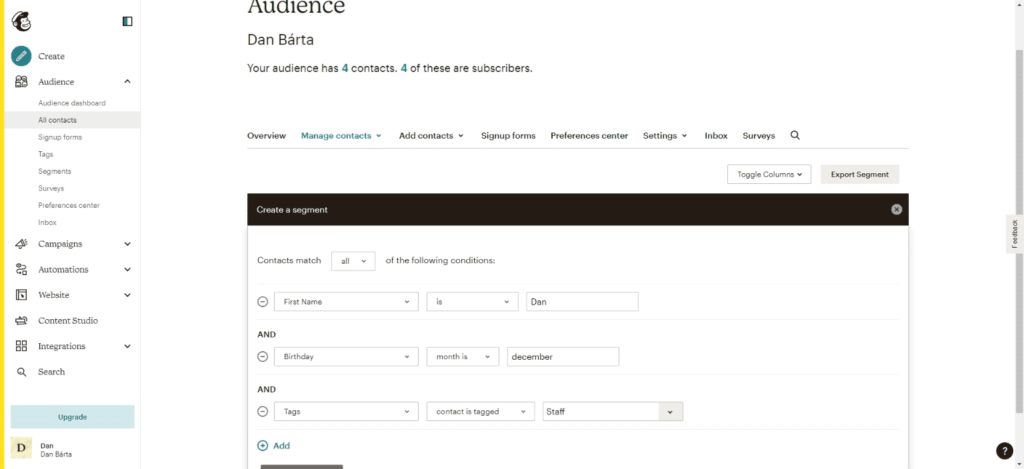
The segments can be combined with each other using either “and” or “or”. This can be changed in the first sentence “Contacts match
all/any of the following conditions:”. This feature may not be visible at first glance, so be more careful here about what you want to enter and what you actually enter.
You can use any information your contacts may have to create the terms. This can be tags, name, birth month, etc. You can also preview the segment to verify that you correctly set the conditions.
Search for specific emails
You can find the search in the Audience -> All contacts tab or at the end of the left menu. You can search your contacts and campaigns. Just enter a keyword in the search, and if it matches something, you will find the results you want. To some extent, I find the search limited and not fully functional. It is not entirely clear what types of the search queries you can use. For example, if I wanted to search by address, I got no results. I did not get a result twice during about five attempts to search for the same keyword twice because I had previously searched for something else.
There is also the option of using “advanced search keywords”. If you want to try it out, you can check
the help of this tool. However, if I were forced to search here regularly, it would probably be mentally exhausting for me.
Contact detail description
The individual contacts can be found in the Audience -> All contacts tab.
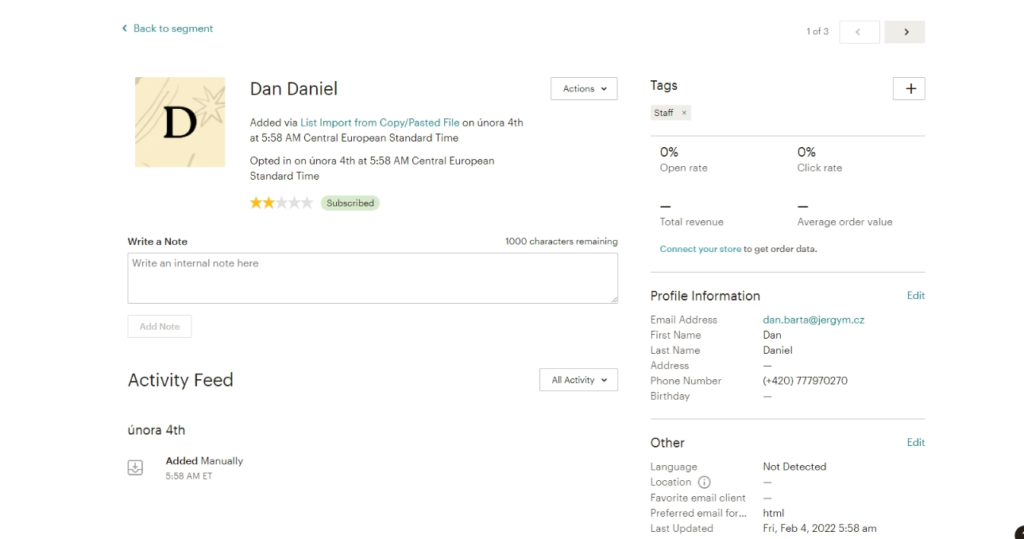
You can click and edit individual contacts. MailChimp will also show their ratings. You can edit the information using the “Edit” buttons, and you can move between contacts using the buttons in the top right corner. Contact quality is calculated by interactions with incoming emails (opened, clicked, unsubscribed, deleted). You can also write notes in the contact details to note individual edits.
This is a pretty clear view of your contacts that you can easily edit.
Forms
It is very easy to create pop-up windows in forms to collect emails. You can find them in the Audience -> Signup forms tab. You have several options depending on what type of pop-up you need and how your site is set up.
Before you start inserting the form on your site, you should go through the Form builder to set up your form. I recommend going through this
tutorial when creating your form. Personally, this has been a problem for me to some extent. Even though I edited it in this category, I couldn’t get rid of the
Subscribe sign in the subscribe button in “Embedded forms”.
The editor is quite simple and easy to set up.

As far as embedding forms on the web, you have the option of embedding via HTML code. If you have a website created via MailChimp you can use the Subscriber pop-up. Here, you will be offered the option to embed on a specific page. You will also immediately see an editor for setting up the pop-up window, which makes your job much easier. I suspect it’s this style on purpose to force users to create pages via MailChimp.
You also can create a
Contact Form, which is used to send questions to your Inbox (this is paid). Creating it is again amazingly simple and offers you to tag the users you are enquiring about and send them an email with an offer to subscribe to your newsletter.
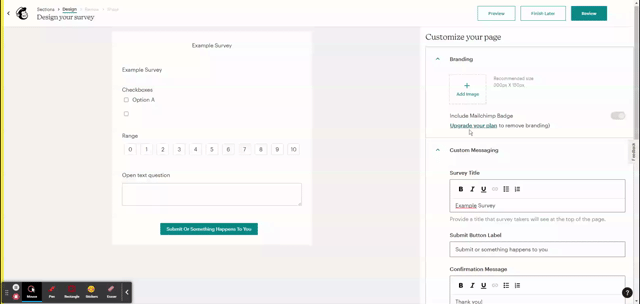
Questionnaires
Questionnaires are created in the Audience->Surveys tab. There are several types of questions to choose from. These can be multiple choice questions with a range of answers (e.g., 1 to 10), multiple-choice, checkboxes, open-ended questions, etc. You can choose mandatory questions and then tag users based on how they answer your questions. You have the option to insert text between each question for easier understanding. The order of the questions can be changed very easily.
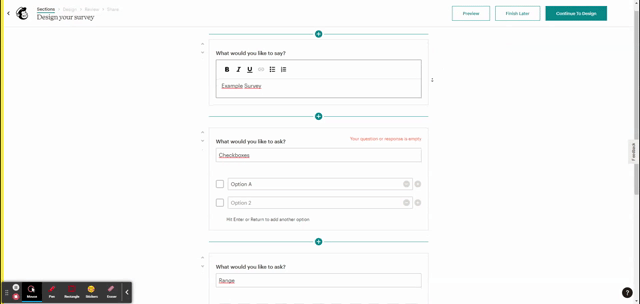
After creating questions, you have the option of creating messages if they skip mandatory fields if the survey is already closed or a thank you message after the survey is submitted. You can also set the name of the questionnaire and the label of the submit button. You can also insert your logo here.
These are mostly very simple questionnaires that are not very interactive. I would compare it to Google Forms, which looks almost identical. If you want to create a funnier and more creative questionnaire, use another tool (e.g.,
Typeform).
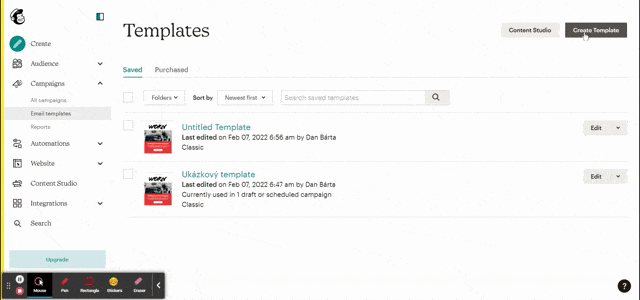
Editor for email content creation
You can create an email template through the campaign builder. The editor can be accessed from the Campaigns -> Email templates tab. Here, you will go to
Create Template. Options will then pop up for you to follow.
The first is the
Layouts section, where you can choose your email layout (some of these layouts are not available for the non-paid version). After selecting a layout, you can further edit the template. Next, the editor itself offers you a variety of options. By clicking on individual elements, you can, for example, change their layout.
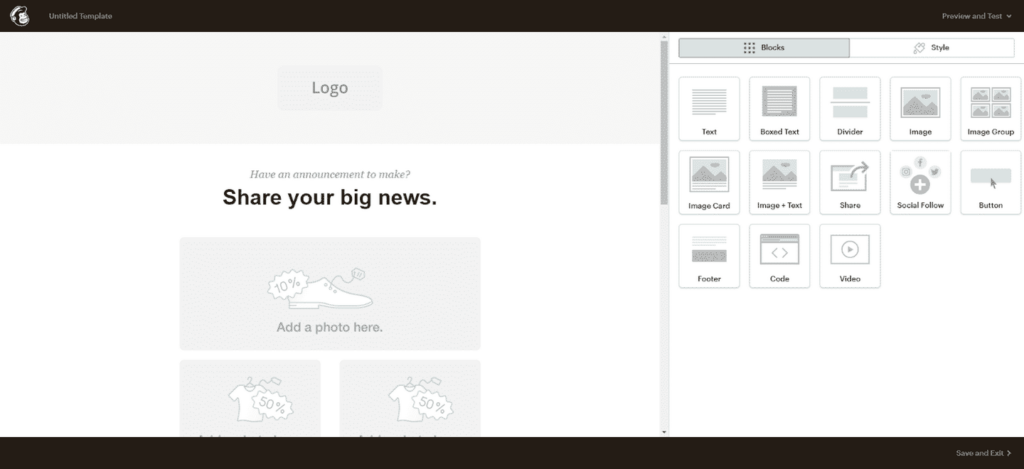
The next section is
Themes (called templates).
Here the templates are sorted by topic. This is, for example, the theme of Christmas, Easter, holidays, etc. Even if you choose one of these templates, you can still edit it and not be limited to changing the text.

There is also a
Code your own option where you upload the code of the template you would like to use. This is a great option if you have such a code available.
Almost everything can be edited very easily and working with the editor is easy and intuitive. It is immediately clear what can be found where and how it can be adjusted. Perhaps one could criticize a certain limitation in the creation. This is due to its simplicity, which, at the same time, limits creativity in modifying the form to a certain extent.
On the other hand, the templates you have to choose from are extremely high quality, and you don’t have to create anything. After creating the design, you have the option to send a test email to check if everything works. You can also enter preview mode to see how the email will look on your mobile or computer.
Email templates can be edited after they are created.
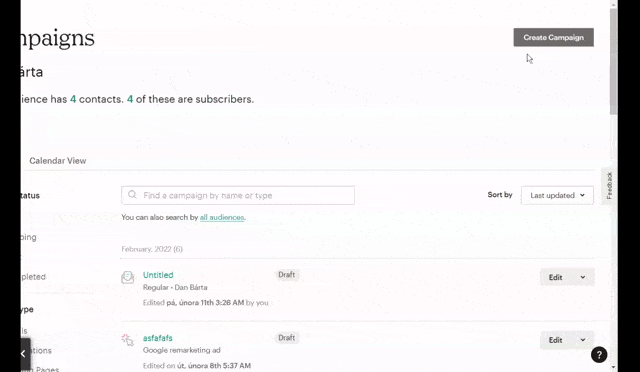
Creating a Standard Campaign
To create standard campaigns, go to the Campaigns tab and click on
Create Campaign. You then choose if you want a campaign that includes:
- email only or
- leads the user to a landing page or
- includes a data collection form.
You can also set who the email will come from (name and email from which you send the message). This creates a more personal environment for the recipient.
If you want to send a regular email, you must first select the audience to whom you send it. You can then personalize this even further by selecting the segments or tags you have assigned to them.
There is also the option to set personalization via the “To” field, after which the field you select (for example, first name) is automatically added.
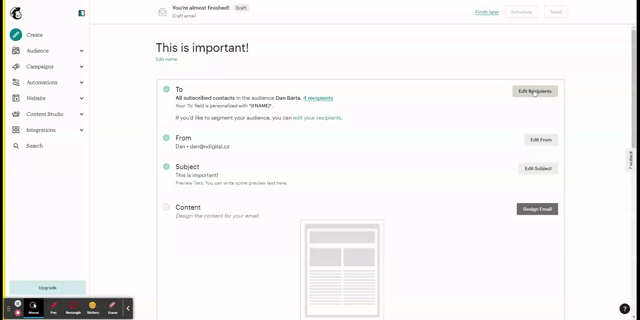
As for the subject, there is only one for the standard campaign. This means you cannot compare the items directly against each other. From my point of view, this is quite a big shortcoming. On the other hand, you have the option to simply create a
Preview Text that appears next to the subject. This can entice users to open your email even more.
You then select the email you want to use for the campaign. This will take you to the editor I mentioned a moment ago. You can choose one of your templates and edit the text in it.
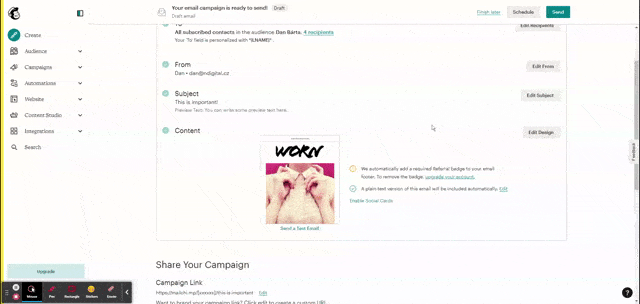
You will then be taken back to the campaign creation, where you will set up your measurements. The measurement settings can be found at the bottom of the page and are quite hidden. Standard campaigns can be scheduled, saved as a draft, or sent straight away. Their creation is very simple.
A/B Testing of Subject and Content
A/B tests are only available in the paid version. The help section gives you easy
instructions for creating them. They consist of having a section of people send slightly different content. You then compare the results, and in this way, you gradually get to the one that is the best. MailChimp allows you to test the subject, name (who the email came from), content, and time of sending. It is possible to test three variants at the same time (this is A/B/C testing).
One of the most important components of an email is its subject line. It matters a lot to find the best one for the perfect open rate. Unfortunately, this option is limited by the number of variants you can test. Three options for testing a subject are really not enough, especially if it is a paid version of the tool.
When setting up an A/B test, you need to specify what part of the audience will be affected by it. There is also a need to decide how the test winner will be evaluated. You can evaluate this by open rate, click-through rate, conversion rate, or manually. You then select after which time the test is evaluated. When the test is over, the winning combination is sent to the rest of the audience; only if you have set the test to the whole audience, no more email is sent to them.
If you choose manual rating or change the settings to manual rating, you choose the best combination and then decide whether to send the email to the rest of the users.
In MailChimp, most things are simple, and you don’t need to think about them for long. However, even here, the simplicity limits the possibilities to some extent. This underlines the fact that
MailChimp tends to do things partly for you and is a tool primarily for people who want to simplify their work.
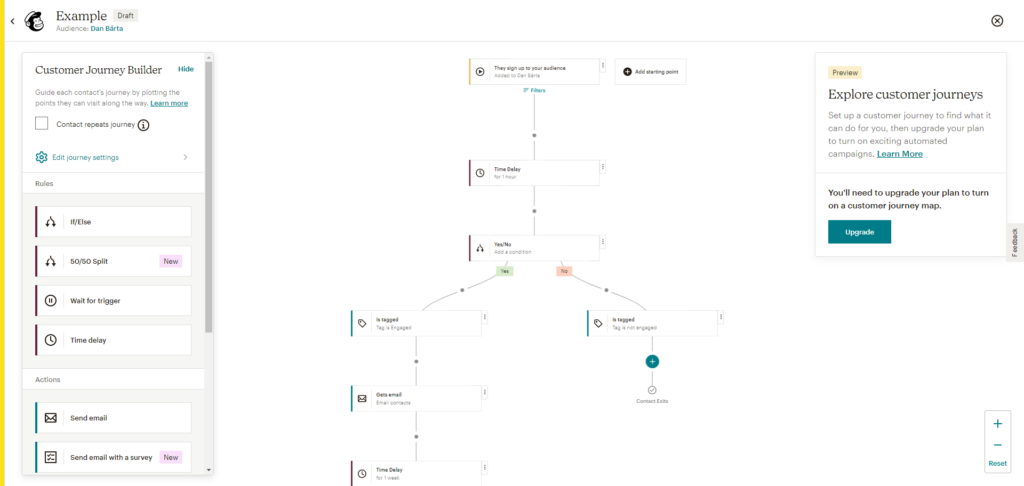
Automation
Sequence of emails
The email sequence is created very simply here based on understandable conditions. I recommend reading what each one means first (it’s written in the rules). For example, you can create a sequence for users who subscribe to your newsletter. You can set it to send an email after a certain period of time and then tag the user based on their interaction with your email. Or you can send them another email if they opened/did not open the last one.
MailChimp also offers templates for such sequences that you can use. However, they are so simple to create that I would recommend looking at one of the templates and then creating your own sequence. Remember to allow time between each step.
When creating sequences, you insert events from two categories:
- One is that there are rules and
- the second is actions.
Actions occur when the rules you set are met/not met. You can also set the sequence for the contacts to repeat. This can be useful, for example, for products that are purchased repeatedly.
Unfortunately, this is a paid element.
Return to cart
MailChimp (as well as
DreamROI, for example) offers you the option of an automatic campaign that notifies users that they have left something in their cart. When creating an email, you can only insert three product cards. There is an option for dynamic content for different groups, but only in the paid version of MailChimp. Again, only one subject can be set, which is definitely a big drawback if you want to test individual subjects. In addition, subjects are the second most important factor influencing open-rate email after deliverability.
You can easily edit the structure and easily switch between previews of a given email, whether it’s how it looks on your computer or your mobile. You must have the paid version to see what it looks like in the directory.
For this campaign, MailChimp must be linked to your store. The MailChimp
tutorials can help you do this.
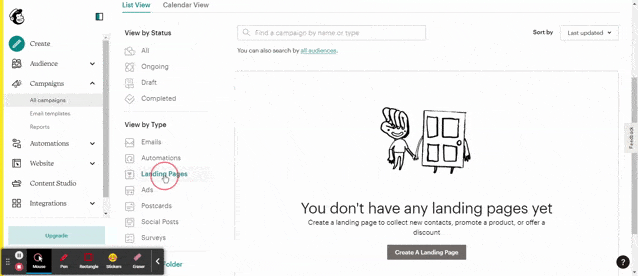
Landing Page
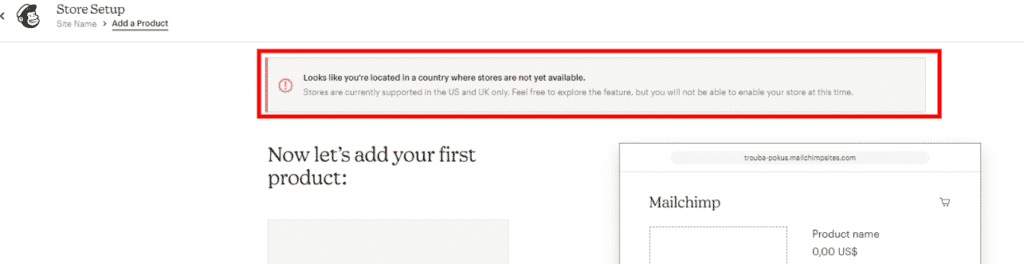
The landing page creation can be found in the tab Campaings->All campaigns->Landing Pages. In addition, you can choose from 10 sample pages. Some of them are linked to the Store, which is currently only available in the UK and US.
Editing the site itself is very simple and intuitive.
You have the option of setting what audience people from this page (if it is for collecting contacts) will be assigned to, as well as how they will be tagged. This setting cannot be changed after publication. You can also start the measurement here. There is an option to link Facebook pixel, Google Analytics and set up measurement in MailChimp to the landing page. If you have the paid version, you can edit the URL. If you have the free version, Mailchimp will randomly generate a URL in the form of
https://mailchi.mp/ [Generate Randomly]/ (you can fill in this part yourself)
.
The cookie bar setting is subtly hidden on the design editing page. If you want to set it up, it’s best to follow this
guide. This is an unnecessarily complicated method compared to setting up a cookie bar on a website.
You can edit the page you create after it’s published, and it can also be depublished. You will be pleased to know that you can monitor the landing page reports themselves and not mix them with the reports of pages created via Mailchimp. There is also an option to copy the landing page.
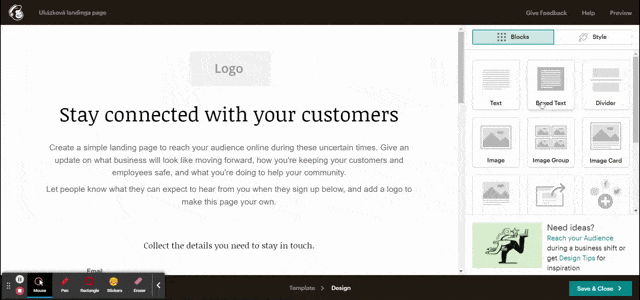
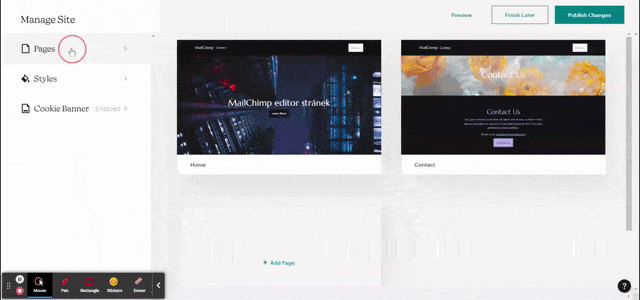
Creation of pages
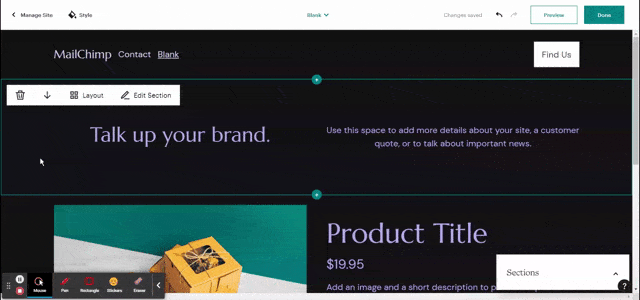
Mailchimp includes a very simple page editor that anyone can use. MailChimp divides pages into sections that you can edit as you like. There is also a link to Unsplash, so after reading the terms and conditions of this third party, you can use their photos. If you would like to change the style of the site in bulk, it’s no problem at all. You can do so in the Styles section.
MailChimp offers you different preset page types. You can also start building a completely blank page.
Adding more sections is a bit hidden, and only appears when you hover between the two sections. Fortunately, they can be easily scrolled, deleted, and edited.
You can create pages using multiple templates. Alternatively, simply link measurement codes to them or use the page measurement provided by MailChimp.
You cannot use your own domain in the free version, and your site will be at.mailchimpsites.com. When you add links to buttons and text, MailChimp will offer you a link to your site. This will make your job much easier. You can also easily add a pop-up window for collecting contacts. This is created using a simple template that you can edit.
If you don’t know what to do, you can watch a few tutorials that are offered on the Website->Website tab. You will also find all the settings regarding measurement codes, pop-ups, cookie bar, etc.
On the same page, you can also find reports on the traffic to your page, the number of subscriptions, the proportion of users who have subscribed, etc. A detailed overview can be found on the Website-> Reports tab. Unfortunately, there are no more advanced statistics, so I recommend you connecting MailChimp to Google Analytics.
Another disadvantage is that the option to add a store is only for UK and US for now. There is also no way to import HTML code into pages created with MailChimp.
For this reason, I would personally recommend creating a website elsewhere and linking it to MailChimp.
Reports
The reports here are divided into individual landing pages and pages that you have theoretically created via MailChimp. For landing pages, you can find them in the landing pages themselves, and for the web, they are found in Website -> Reports. Campaign reports are also available here.
In terms of page reporting, you will find the number of subscriptions, page views, unique visits, and the ratio of subscribed users. Visits are also divided into visits to individual pages. So, these are very basic stats. If you had a store connected here, you would also have the store stats (it is only available in the US and UK). If these basic statistics are not enough for you, connect Google Analytics to your website.
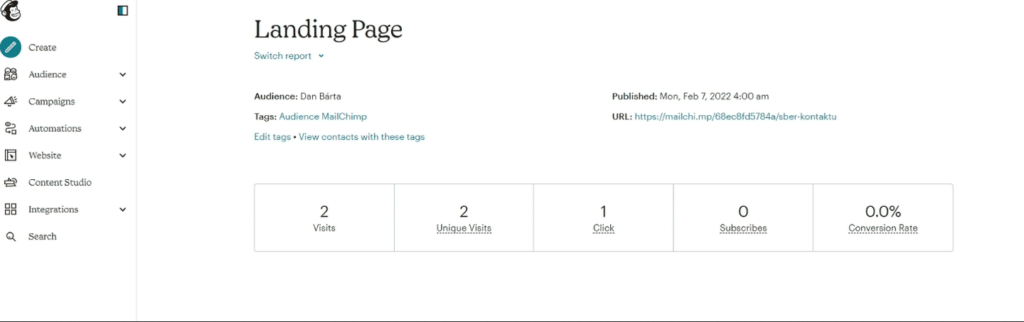
As you can see, the Landing Page report is also very brief and doesn’t tell you much in the end. Unique visits do not correspond to 99% of the reality since I am the only one who visited the page.
Campaign statistics are now more detailed. You can tell that this is primarily an email tool, and the other stuff is a bit extra. However, I would have expected more detailed stats for the landing page.
Here you will find virtually all the statistics you would expect.
- Number of opened emails
- Number of openings
- Successful deliveries (absolute and percentage)
- Clicks
- Orders
- Revenue
- Average order value
- etc.
I find the stats here understandable and concise. I would fault the geo-tagging of the opening location, where MailChimp tells me that I opened the emails in the US.
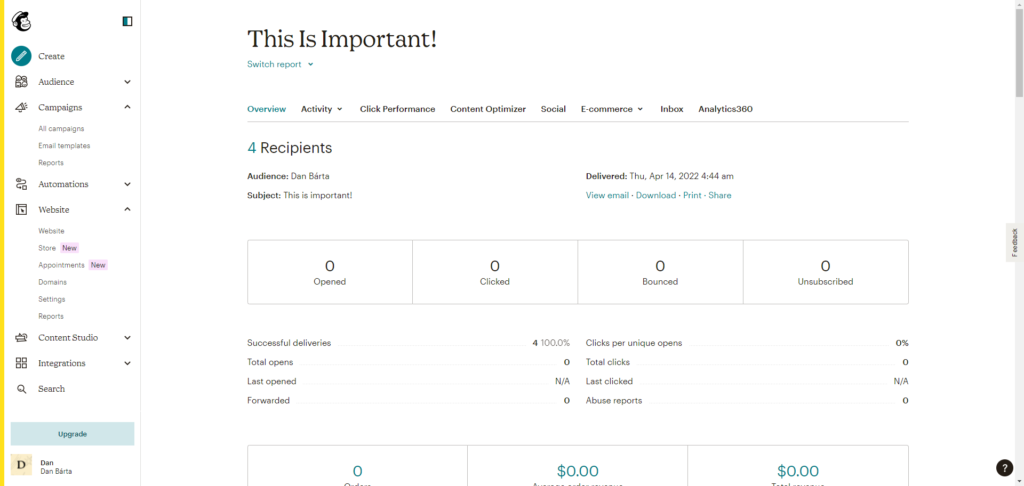
In addition, you can easily switch between the different statistics. The
switch report button under the campaign name is used for this purpose. Finally, in the Content Optimizer tab, you can find recommendations for your campaigns (not available in the free version).
Deliverability
In the long run, MailChimp has superior deliverability. If you want to read about deliverability in more detail, I recommend
this article, the data is regularly updated, and the tests are repeated. If you want to know the actual, it was 85.2%, and the average deliverability for the instruments measured was 85.3%. It also breaks down specific deliverability to certain email services. Of these, you might be most interested in the deliverability to Gmail, which is less than 100% in the long term.
Price
MailChimp offers 4 plans:
- Free
- Essentials
- Standard
- Premium
Unfortunately, the price of each plan is not fixed and is influenced by the number of contacts in your database. The payment is, therefore, not a one-off but monthly. In addition, there are many differences between the plans, some of which are related to customer support. For example, in the free version, the only customer support is by email and only for the first 30 days.
Another big difference is that you can create
ads with standard and premium plans. I also mentioned above that A/B testing is impossible without the paid version, which you can’t do without if you want to create the most effective campaigns.
The Essentials plan starts at €9.71 with up to 500 contacts and ends at €299 with up to 50,000 contacts. Standard starts at €15.01 with up to 500 contacts and goes up to €605 with up to 100,000 contacts. The premium plan starts at €263.96 with a limit of 10,000 contacts, but the maximum amount and price can be negotiated with MailChimp.
To compare individual plans, I recommend reviewing the
comparison directly from MailChimp. You will be forced to use the paid version if you want to use MailChimp for e-commerce. On the other hand, if you only want to send out newsletters for some of your own blogs, where you don’t count on many contacts, then the free version will probably be enough, even though you can’t plan mailing.
Summary
The tool is clear and simple. It is suitable for you if you don’t mind paying for an email tool or if you only need to send out emails manually. Many important features are only available in the paid versions, and you have to pay extra for some features in those versions (e.g., domain name for landing page creation). Some of these features are essential for e-commerce. Unfortunately, once you start growing, there are better tools (features) for comparable money.
In one sentence: For non-technical small business types who only send out manual emails.